<tc>Variand</tc> Configure
Before we get started, here are a few pointers:
START
It's best to read through the tips below first.
SAVE
You can only save your configuration if you have previously created a customer account.
MOBILE USE
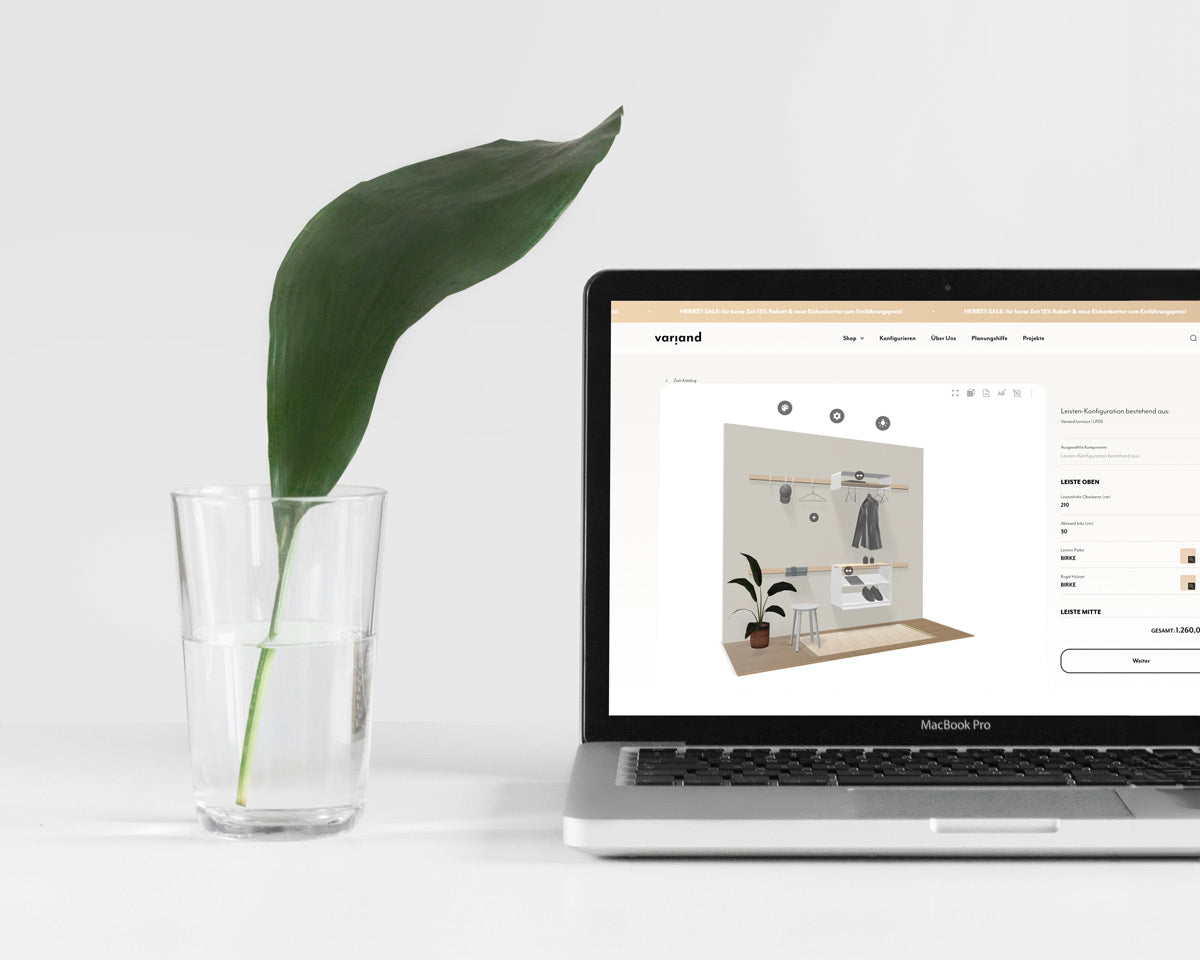
We recommend mobile users to use the configurator in full screen view or via desktop.
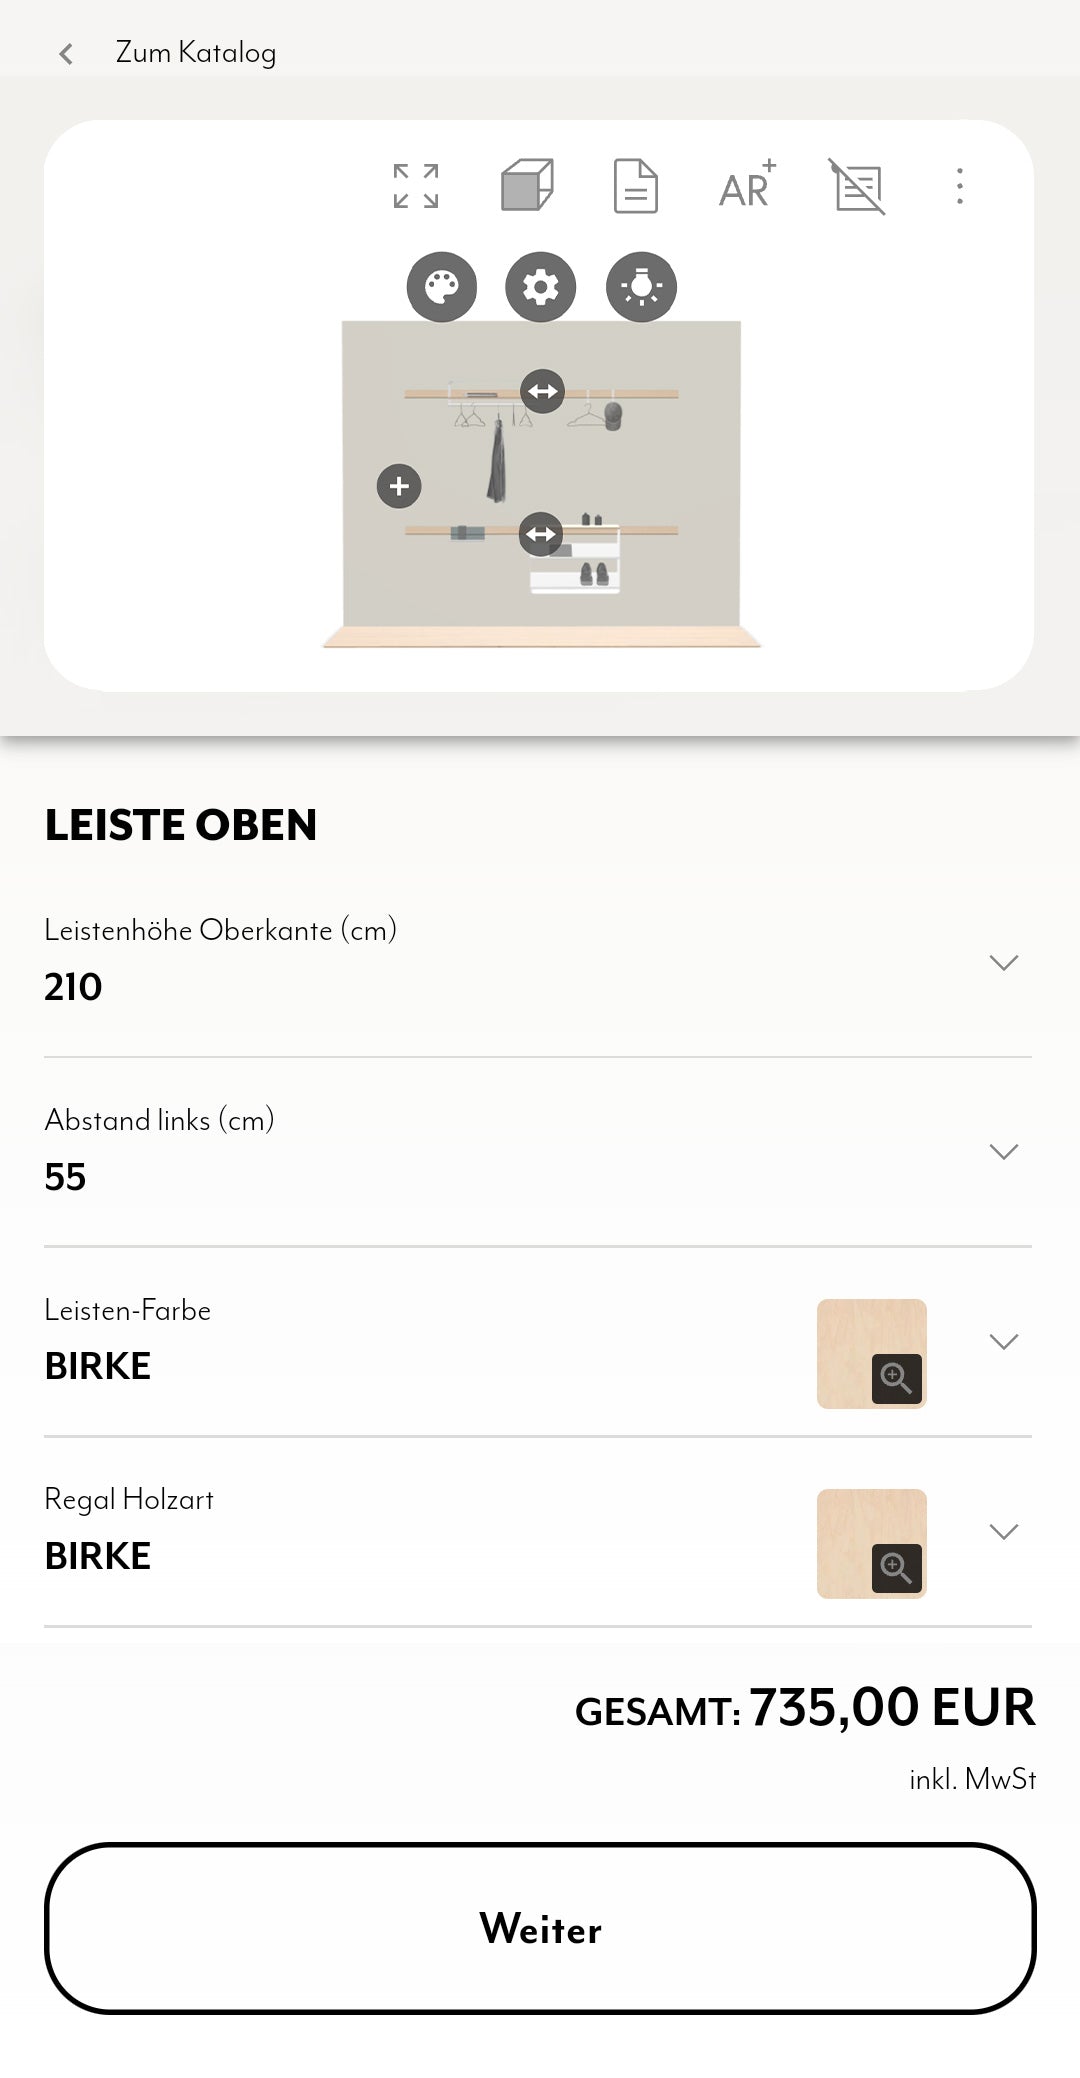
The mobile surface explains
In the upper window with a white background, you create your 3D configuration using the grey icons.
In the lower section, you can scroll through various global and product-specific properties and adjust them. At the very bottom, you'll find the total price and can add the configuration to your shopping cart or save it (when logged in).

IMPORTANT:
For clearer mobile planning, we also recommend using full-screen mode.
You can find more detailed explanations by clicking on the green buttons:
The desktop interface explains
In the left window with a white background, you create your 3D configuration using the grey icons.
In the right-hand pane, you can scroll through various global and product-specific properties and adjust them. At the very bottom, you'll find the total price and can add the configuration to your shopping cart or save it (when logged in).
You can find more detailed explanations by clicking on the green buttons:
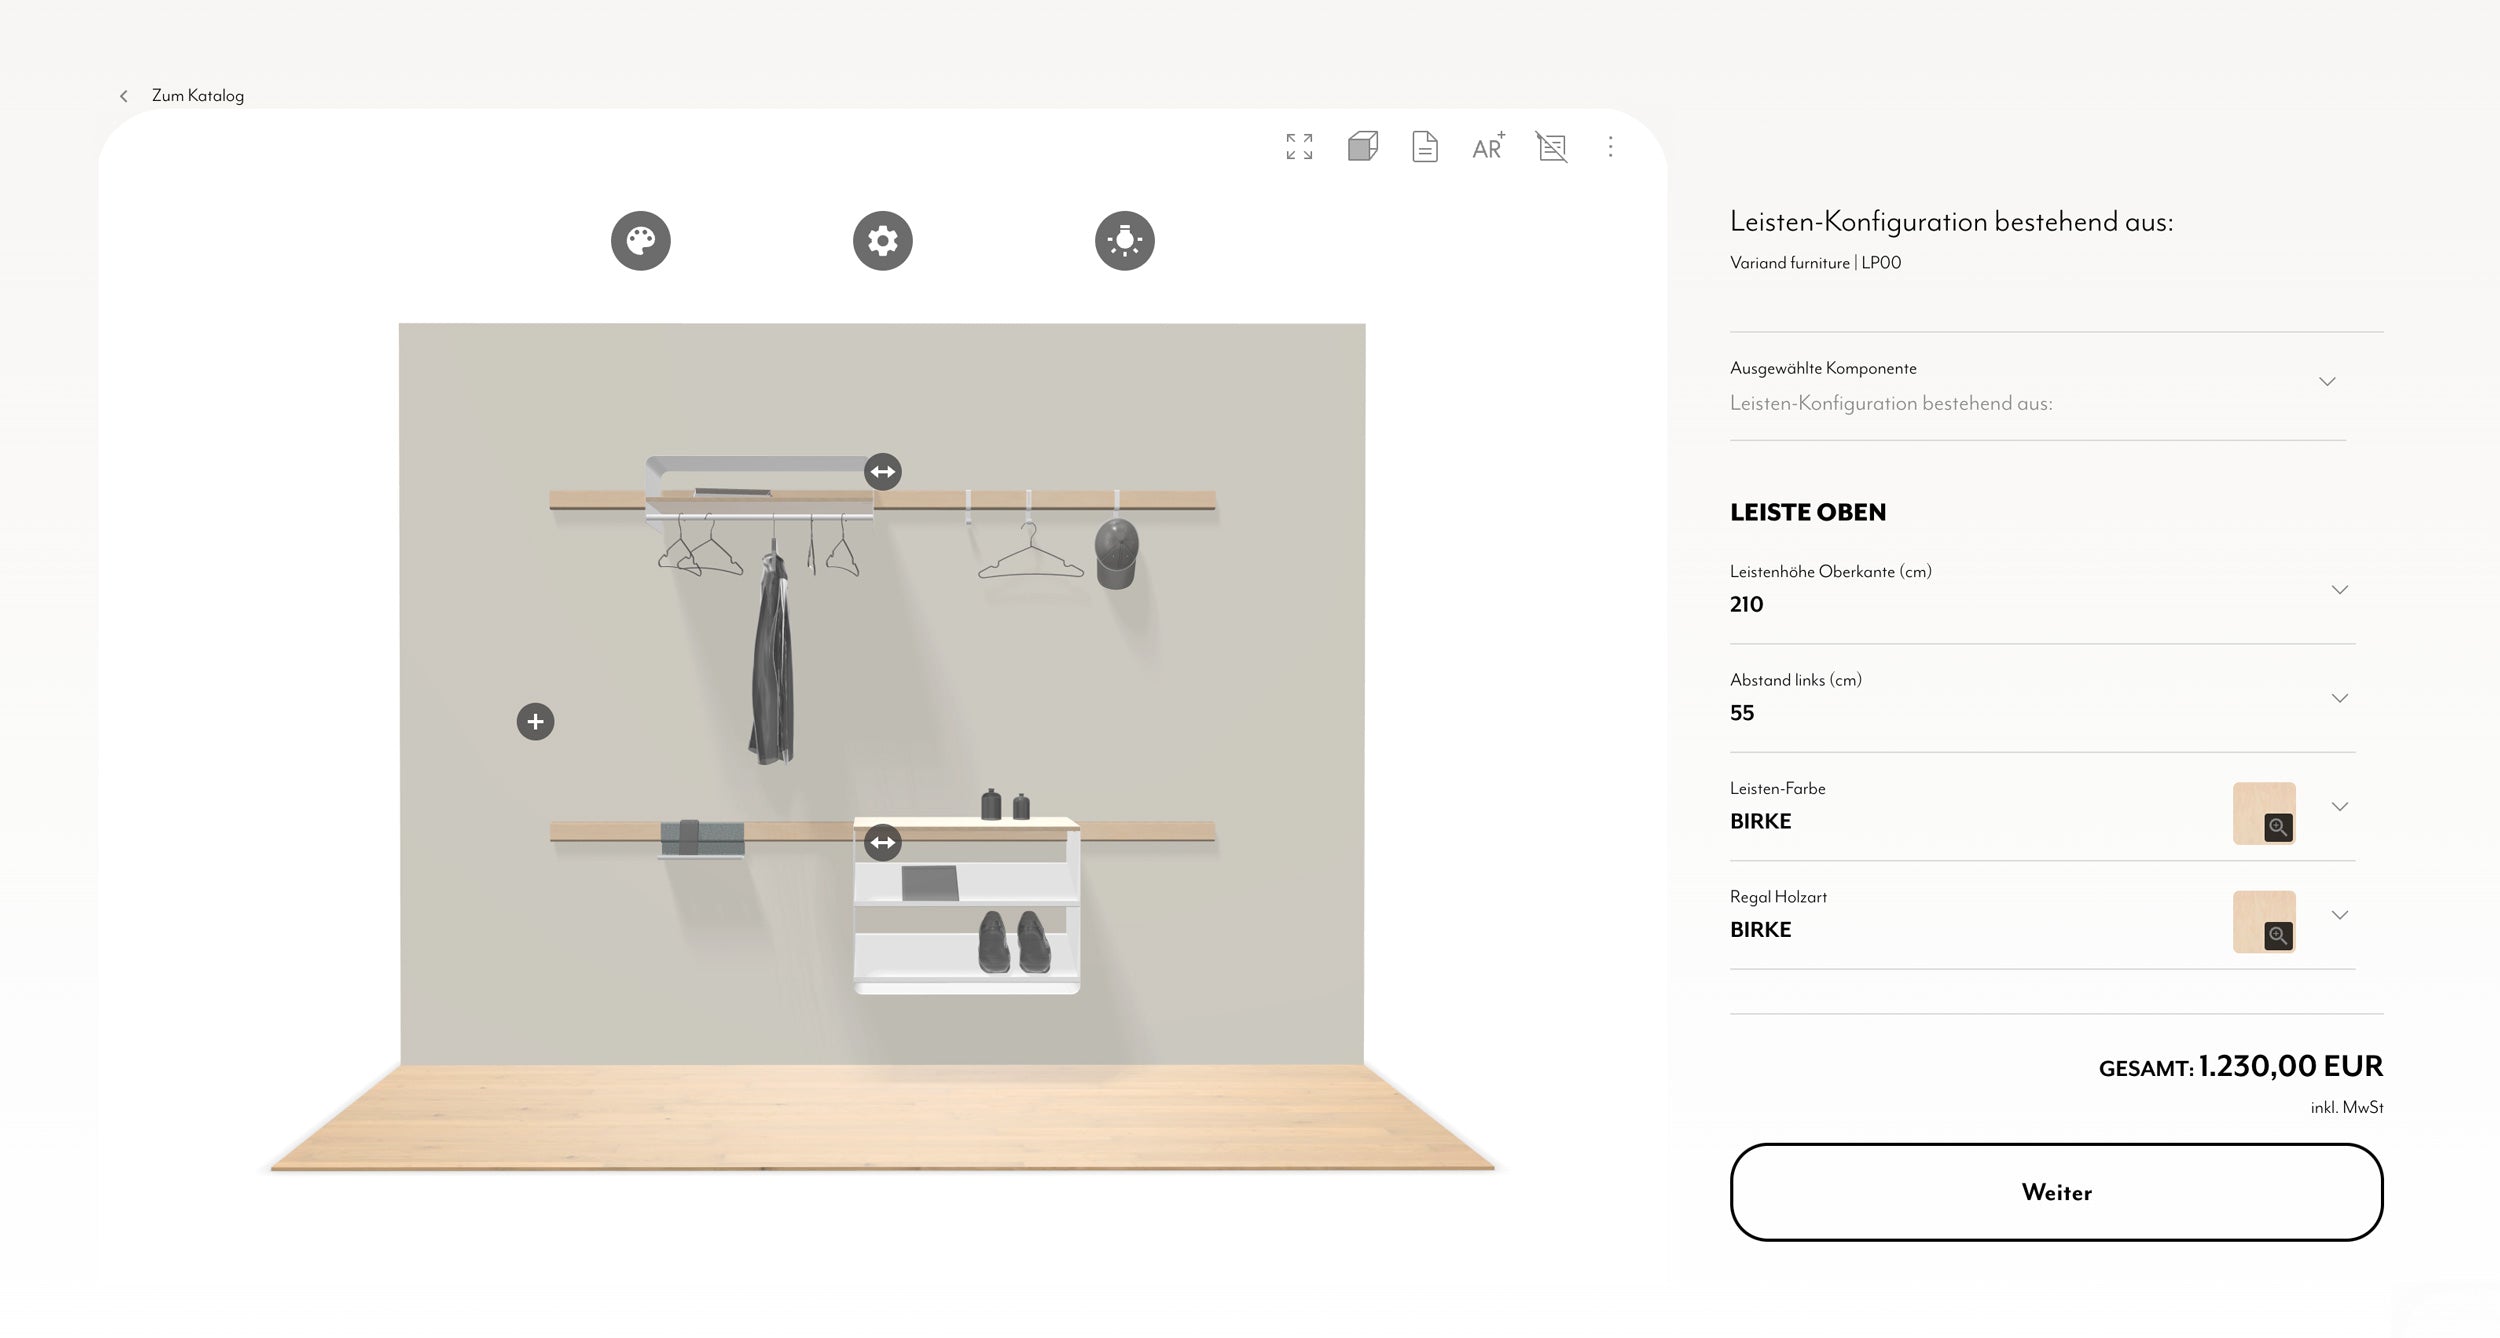
3D window & pictograms
In the white background 3D window you can navigate with the mouse or your fingers and by clicking on the grey icons
With a click on a
Property area/ scroll area
In this area, you can scroll through and adjust various global and product-specific properties.
By default, you will find the
If you click on a
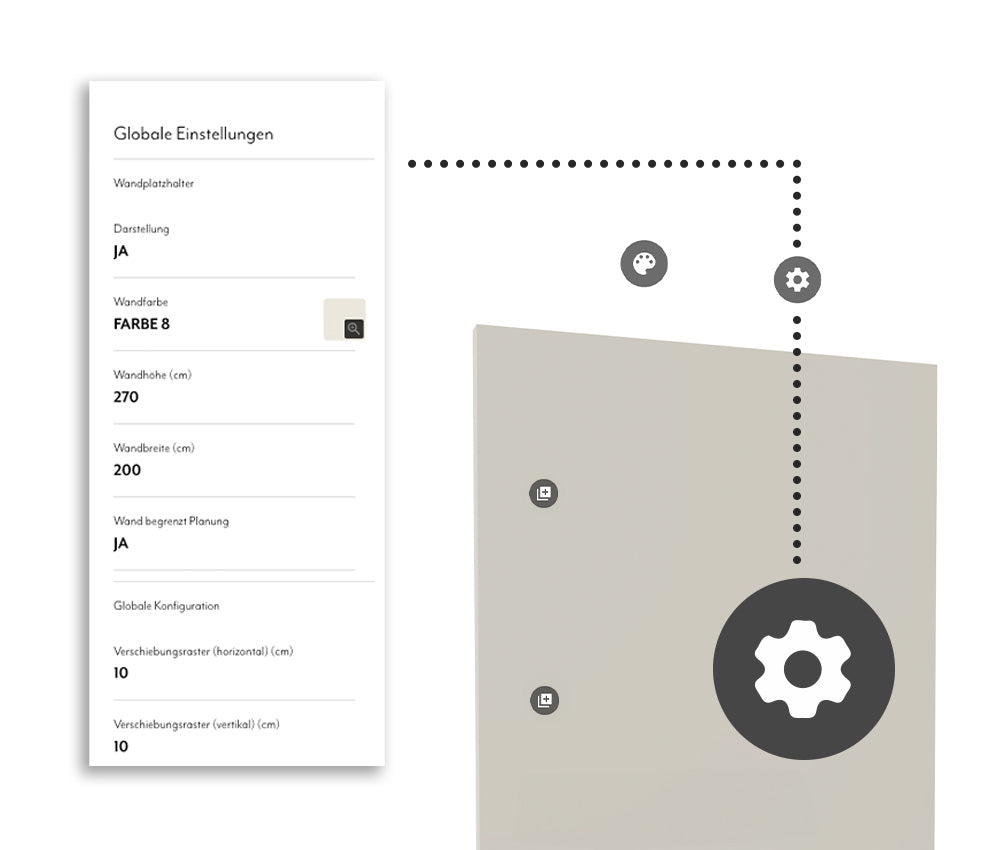
Global settings
Through the three large pictograms, you can make the following settings:
Color palette: Adjust the colors and materials of the
Gear: Adjust the heights and wall distances of the
Lamp: Globally show or hide decorative objects.
Planning options
Here you can access the following functions via the gray pictograms:
- Full screen mode (important for mobile users)
- Adjust front view
- Create PDF/ Snapshot
- Show/hide pictograms
- Augmented Reality
- Show dimensions
Prices and save
At the bottom of the scroll area you will see the Total price for your
By clicking on “Next” you can Add selection to cart or, if you have a customer account and are logged in, the Save configuration.
Individual prices You can display it at the top of the scroll area by clicking on “Selected Component”.
All prices in the configurator are usually undiscounted. Promotional prices or discount codes are only applied in the shopping cart or checkout.
Step by step to your own configuration.
The configurator in detail
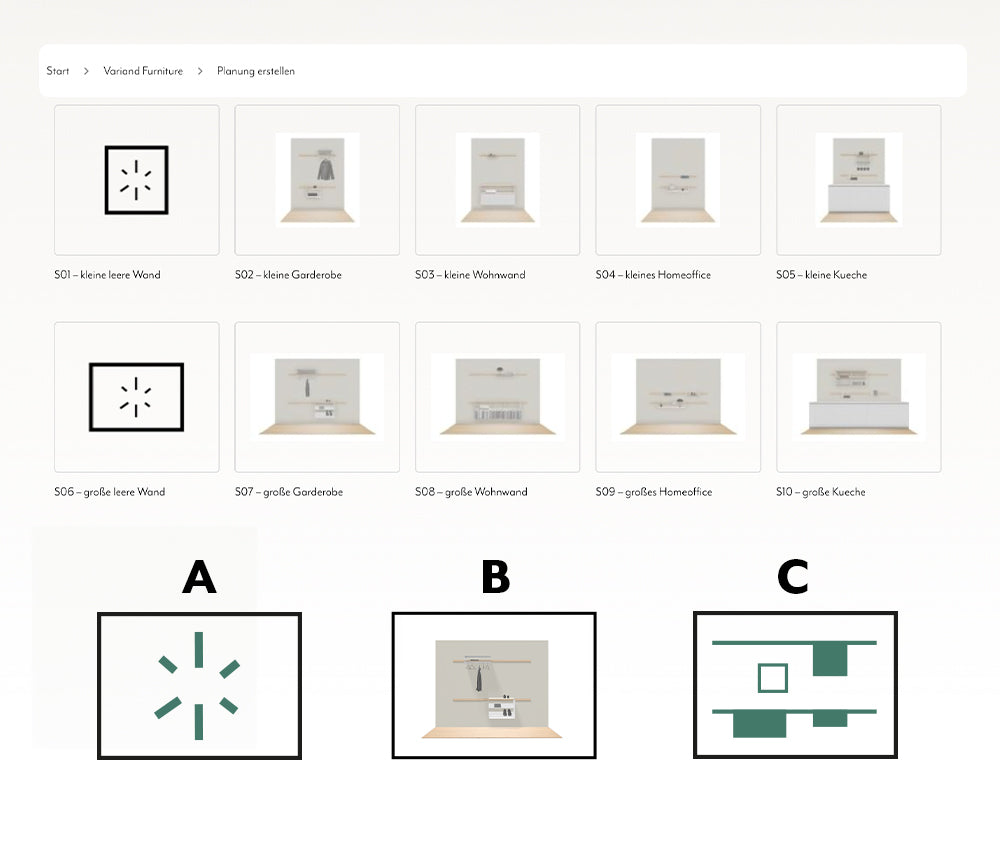
1. Select start
A – Start with an empty wall that's 2 m or 3.5 m wide. You can adjust the width later.
B – It is a little easier to start with a starter set, in which certain furniture is already placed for the various applications.
C – Get inspiration from fully furnished and decorated sets or use them as a basis for your planning. Please note that some decorative elements will not be saved.
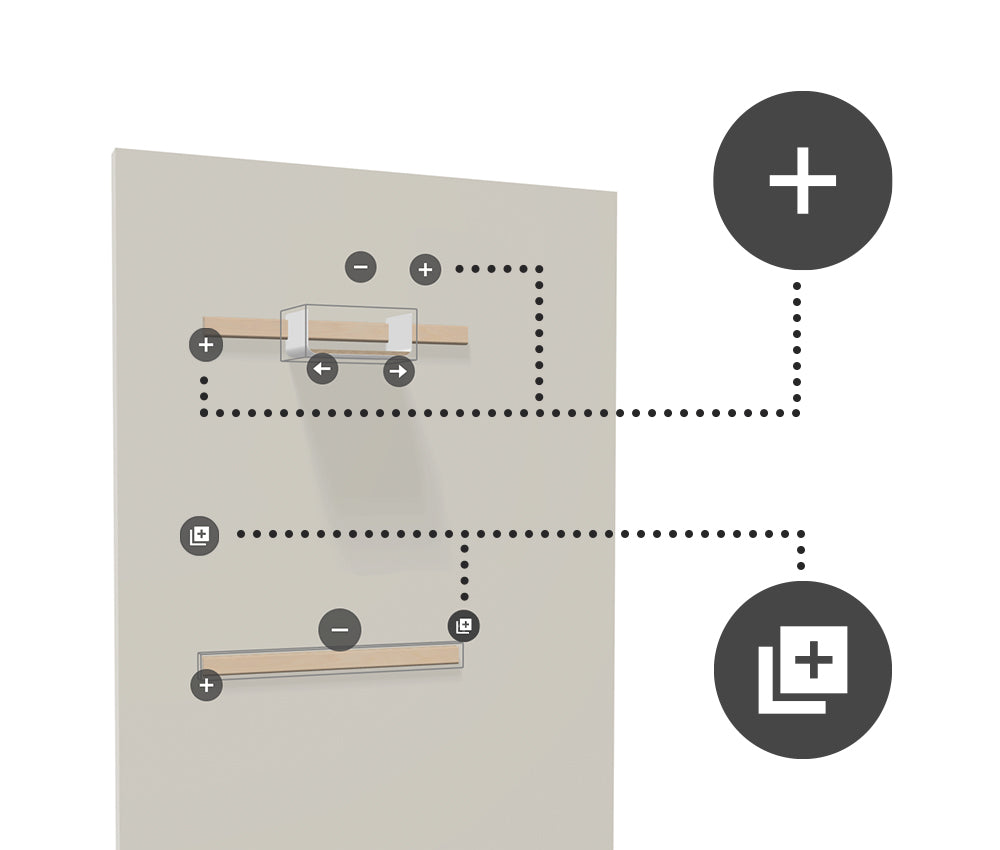
2. <tc>wall rails</tc> & Add Furniture
By clicking on the double plus symbol, you can add to an empty
By clicking on a

3. Remove
You can remove
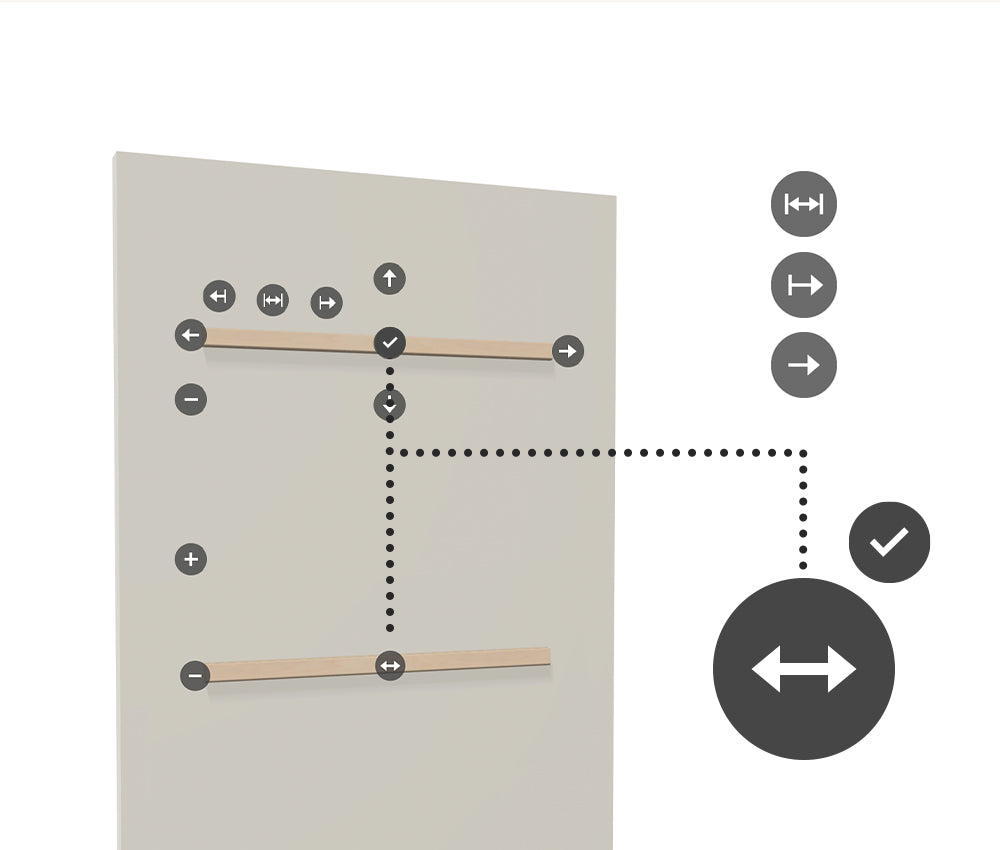
4. Move
Furniture, once selected, can be moved left or right by clicking on the arrows and they can skip over other furniture.
With the
Each click on one of the arrows will move the object by default by 10 cm. You can also adjust this shift grid (see point 6).
5. Adjust wall / global settings
By clicking on the gear you can access various global settings and, for example, adjust the dimensions and color of the wall, the
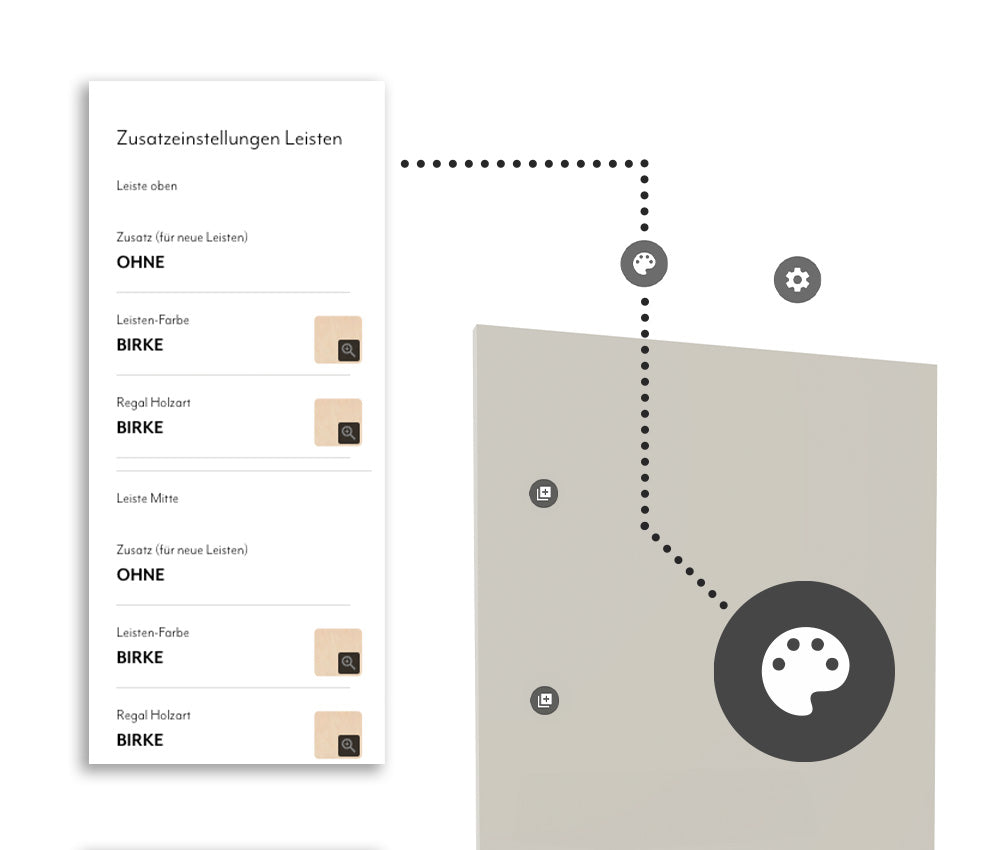
6. Adjust materials
Using the color palette you can select the material or color of the
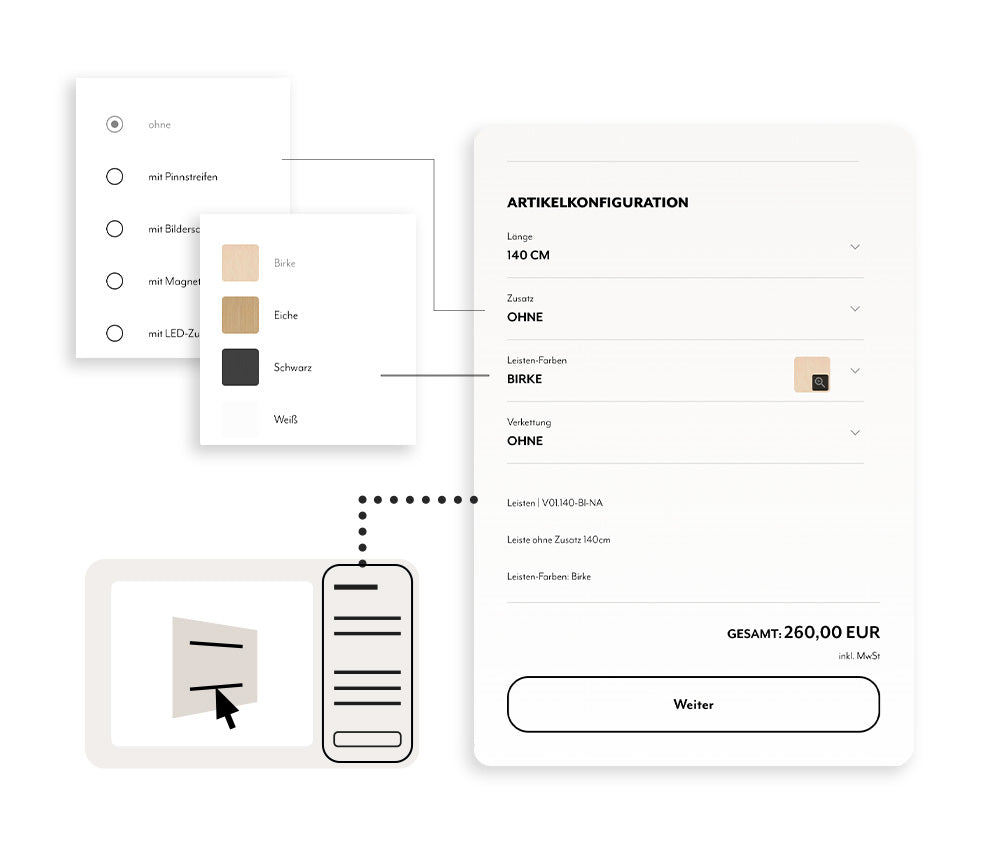
7. <tc>wall rails</tc> & customize furniture
Click in the 3D window on a
Here you can, for example, adjust the
Selected
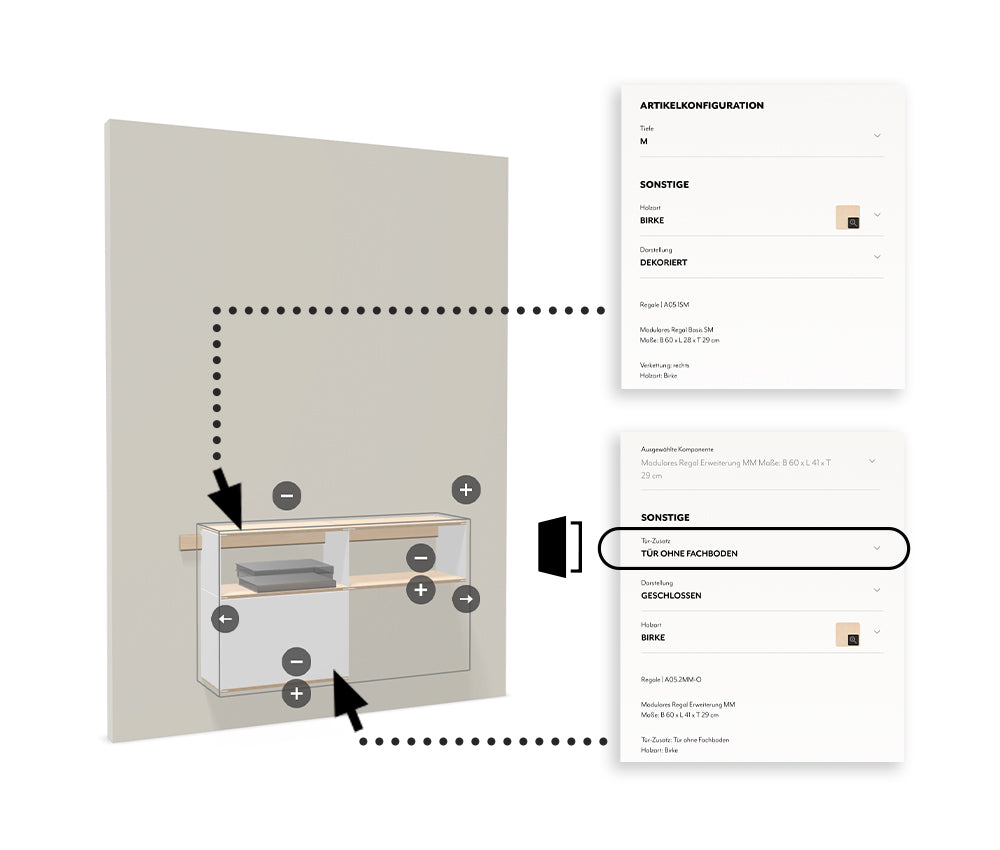
8. The modular shelf
To build a shelf or sideboard with the A05 modular wall shelf, you first need to place a hanging shelf. From the first shelf, you can add additional shelves downwards and to the right above +.
The first compartment at the top left always remains the parent item for the entire shelf. This means that only when you select this compartment can you add/remove compartments, move the shelf, or adjust the depth or wood type for the entire shelf in the properties panel on the right (bottom right corner).
If you click on one of the other compartments, you can change the wood type for this individual compartment in the properties area or for the larger compartments Add doors.
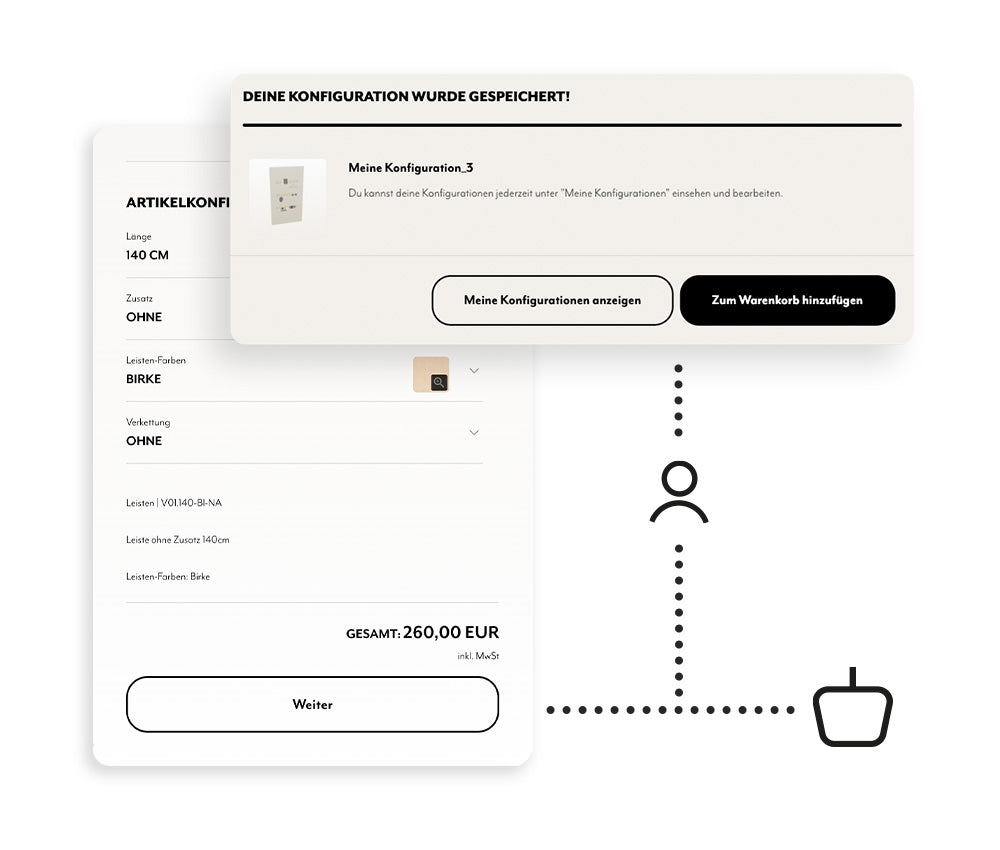
9. Shopping Cart & Save
By clicking "Continue," you can add your configuration to your shopping cart. On mobile, you'll find the button by scrolling down at the bottom.
IMPORTANTPlease note that your configuration will only be saved if you have previously created a customer account and are logged in. Without logging in, your configuration will only be added to your shopping cart, but you won't be able to open it again.
If you are logged in, the plan will be saved and you will have the option to open it in your customer account and create a shareable link to the plan.
You are ready to get started ?
Start with your configuration
If you want to save your configuration, you must create a Create a customer account or you in your existing Log in to your account.
You need help ?
Through the links below, you can access our selection assistance page or send us a direct planning request and we will take over the configuration for you.
You can reach our support team at service@variand.de or by phone at +49 157 37953824
